
Here's how my Oliver + S Popover Sundress turned out!
I made this dress for the daughter of one of my childhood best friends. I'm a little nervous about whether or not it will fit because I have never seen the little girl in person, only in photos. According to her mom, she's wearing a size 2T, so I made this dress by the size 2 of the pattern. (See my post about these labels here).

At the very least it'll be too big, and she'll have a new dress to wear next spring. Or, I guess she could always wear a long sleeve t-shirt underneath it in the winter. Either way, the dress turned out pretty stinkin' cute if I must say so!

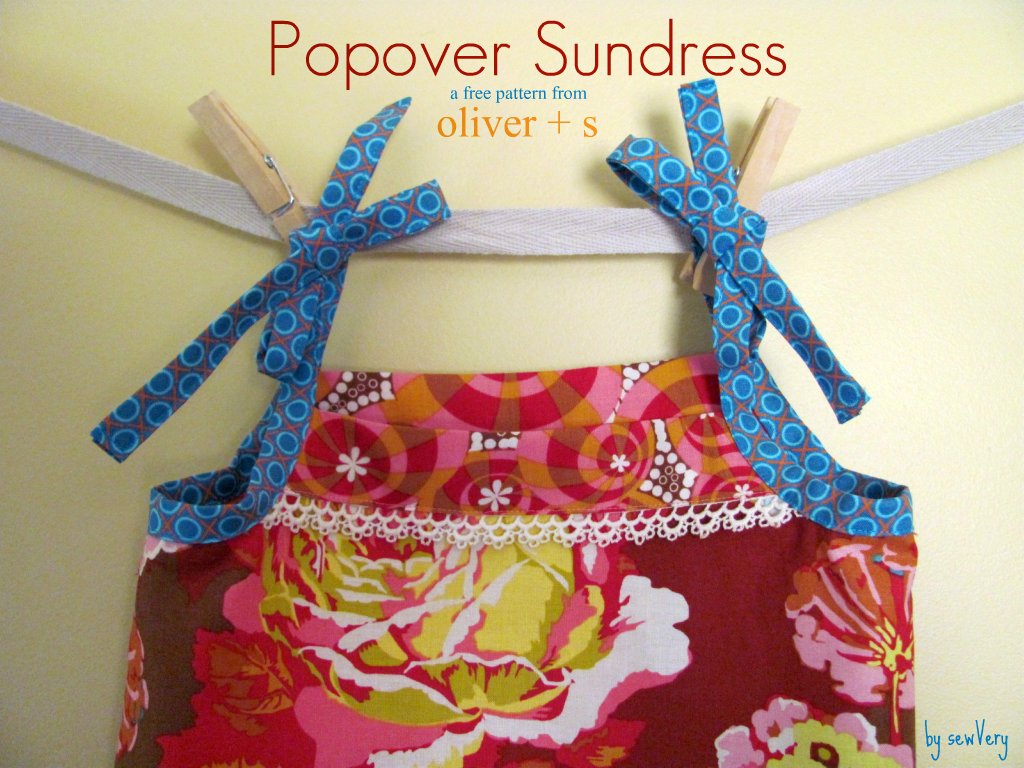
I used some more fabric that I had been hoarding, but you know what? The fabric looks even prettier turned into this lovely little sundress. And look at those butterflies. They just happened to be right in the center of the front dress panel!
What fabric is this you might ask? All four fabrics I used are from Anna Marie Horner's Loulouthi collection. The main part of the dress is Clippings in Cherry, while the yoke is Buoyancy in Butterberry, the hem is Coreopsis in Lime, and the ties are Hugs and Kisses in Ocean.
As with all Oliver + S patterns, the attention to detail is impeccable. I mean, the instructions are easy to read and understand and accompanied by lots of diagrams. The techniques they show you how to use make the garment look so professional!
One thing I like about Oliver + S patterns is that they give little hints on how to make your garment even better. For instance, it suggests you add some ric rac or trim to the yoke piece, which I did. I happened to find this scrap piece of lace trim in a bag my mother-in-law gave me. It was the perfect length!

I only had roughly 17 inches of the main fabric which wasn't long enough for the size 2, so I decided to add a little hem strip to the bottom in a coordinating fabric. To me, this extra pop of color completes the dress.
The pattern did not have instructions on how to add this piece, but it was very simple just to cut out a 3" wide strip of fabric that is the same width as the bottom of the dress. I folded in the long edges roughly 3/8" and pressed them flat, then I folded the entire piece in half and pressed it. This makes it look sort of like a piece of bias tape. You then attach it to the bottom of the dress the same way the pattern shows you how to attach the bias tape to the armholes.
I even had a sewVery label in the same colors as the hem piece. It was meant to be!

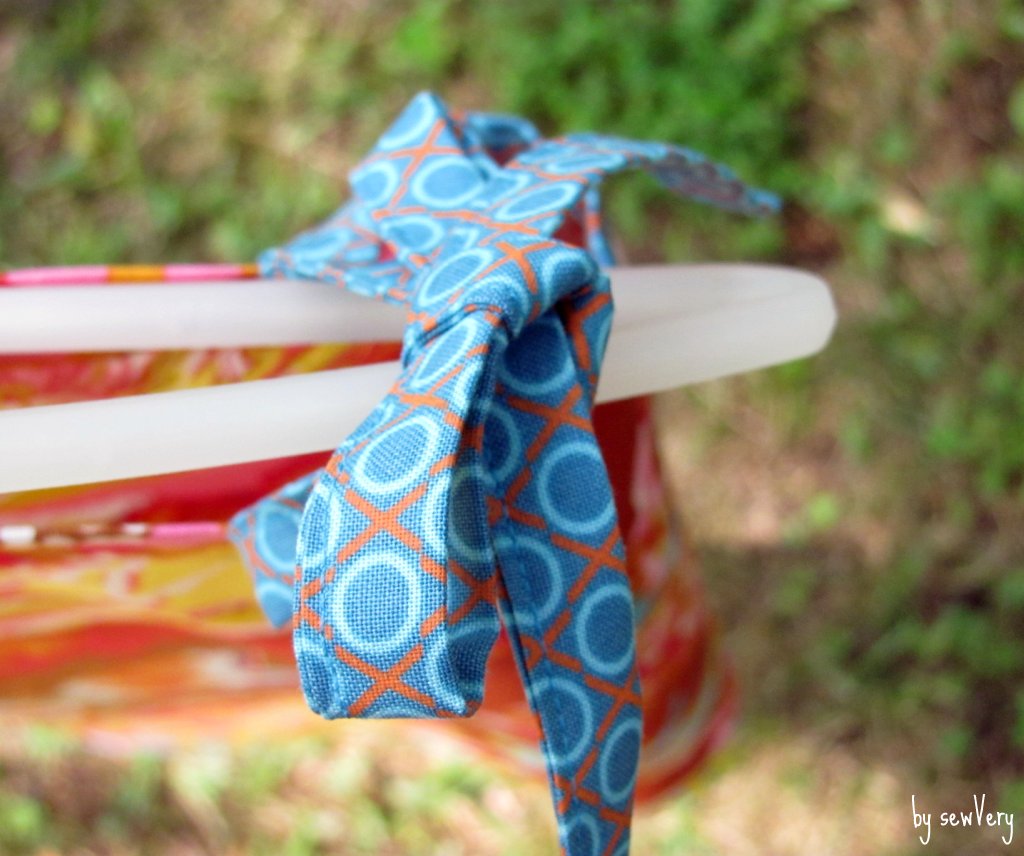
The tie straps help to add a pop of color to the dress as well. I'm very partial to the orange and blue together (War Eagle!), and I know my friend is, too.
All in all, this is just a superb pattern. Thanks again Oliver + S for providing it for free, and thanks to Susan at Living with Punks for blogging about your version. Both inspired me to make this beautiful dress for a beautiful girl.
 |
| Front |
 |
| Back |

I hope my friend's daughter, Murfee, will love it as much as Ella and I do! Ella has already put in an order for a dress just like it for herself. My girl really doesn't need anymore clothes right now, but I just can't turn down this face. Could you?

Love it!!! I have been wanting to make it too - I have too many projects on my to-do list! lol!
ReplyDeleteLove the addition of lace...
ReplyDeleteGreat job on the dress! Love your fabric choices, girl! And no, you just can't turn down that face. Janelle
ReplyDeleteCute! I love the Oliver+S patterns. You dress turned out lovely!
ReplyDeleteLOVE IT!!!!!!
ReplyDeleteThanks so much for sharing this at The DIY Dreamer.. From Dream To Reality!
This comment has been removed by the author.
ReplyDeleteWow...Awesome!!!Love the pattern & color,Thanks for sharing such a great idea.
ReplyDeleteWWW.BLISSFULSEWING.BLOGSPOT.COM
I love your version of the dress! I also think that the bottom band completes the dress. I like your labels, they look professional. Where did you get them?
ReplyDeleteI am in tears. It is the first times ever that I have made anything that my daughter actually let my granddaughter wear it and is so happy with it. You have not only made me so proud but bousted my self esteem so much. Thank you.
ReplyDelete